Wednesday, May 22, 2024

DIY Steering Wheel

I have old spindle motor that only used a couple time, because the loud noise of my CNC i never used it... at least for now... so i decided to make use of the spindle and turning to Steering wheel for PC. got my Voron V2 ready for printing the model needed.   

Sunday, April 9, 2023

Voron-Tap Build Log


Voron 2.4 
I'm still having an issued when leveling the z gantry. The next thing i have in my mind were replacing with voron tap. Waiting for the electronics parts arrive.
The printed parts were ready.

8-April 2023 i bought optical endstop from Solarperfect. the idea is, desolder the part i need,..which is the sensor, added longer wire and connect again to the board and test it. All thought there is solid  tutorial about it, finding the right sensor with the same type is the hard part... So i begin with the typical endstop and see if it work. 

Stupid fact: 
Took an hour or less to desolder the sensor carefully so i not damaging any thing on the process...and then you realize, you can took off the back plastic cover from it. The black plastic just a cover and the parts inside is the two sensor....duh!
So, just took off the black cover, clip the sensor legs, rewiring it orderly and your done...save you time.
Everything work fine and perfectly connected and waiting to the next phase.

09-April-2023
Waiting the MGN9 from chinaa.

15-Apr-2023
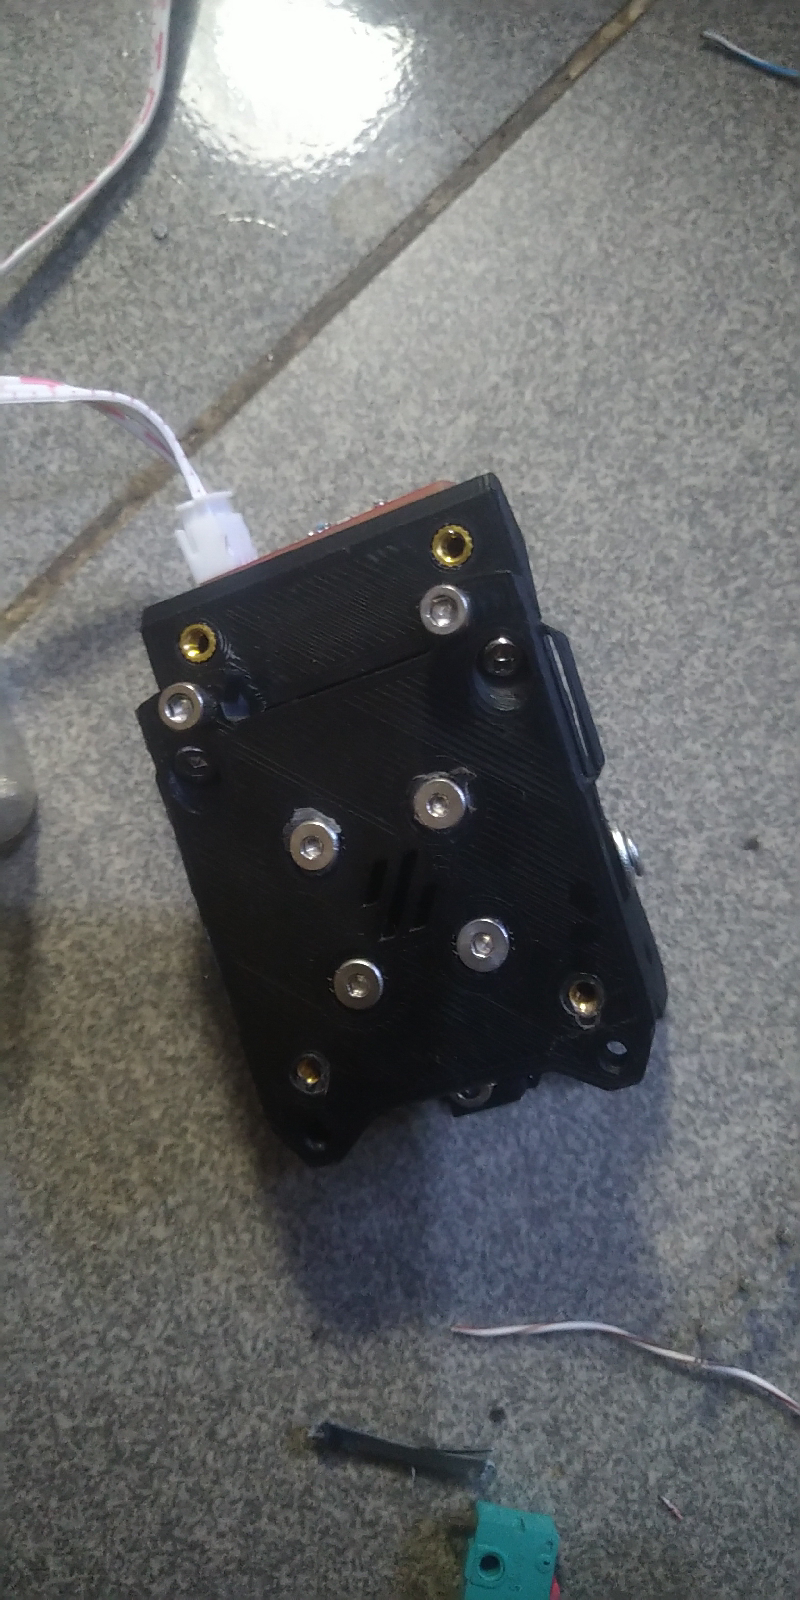
MGN9 arrived. Assamble the part, then i notice the sensor board blocking the toolhead. 

Pending progress.
 I've to resolder and rewiring the sensor, print another voron-tap model and buy 6mm and 5mm flat headed hex screw.

Saturday, March 25, 2023

Stealthburner

March,25-2023
First layer is crucial,if its not stick to bedplate it will defect the part look and perhaps function. 
Adding light near by the extrution help us to watch the first layer as it print and tweak or adjust the nozzle height. 


I use RGB light strip that i have from the chamber light. Carefully cut it and slide it to place on the bottom.
the logo light place holder(back side)
logo light place holder(front side)

Wiring it was easy, need 3 wire (5v, GND and Din) see the arrow on the RGB light strip. Note: Din = Data In, Data from mainboard to rgb light mark with arrow. Dout or Data Out is to connecting the other RGB light and so on.
The plan is to connect at the end of my existing chamber light, and hope it work.

March,26-2023
Done wiring and test it
need to rewiring the toolhead. Look great 

Tuesday, March 21, 2023

KLIPPER INSTALL

 KLIPPER INSTALL (10/08/2024)


Klipper installation with raspberry 3.5" LCD

Saturday, October 1, 2022

ENDER 3 V2 upgrade firmware

Since the Voron build is on hold, I've been tweaking Ender 3v2(keeping my head busy :) ) from stock firmware to Marlin 2.1. Why Marlin?... there a new feature that help you achieve good result of printing with less effort. There is a lot of firmware out there to choose, but I chosen Marlin firmware, because unlike Klipper that need Raspberry Pi to run it.... Marlin firmware is the native 3D Printing firmware, its open source, doesn't need to buy extra compute module that cost you half of the printer price itself, with a little knowledge, information and understanding the limit of your 3D Printer its had a lot feature you can unlock. 
But if you want a shortcut, you can try Jyer's firmware (if I'm not mistaken it's base on Marlin 2.0). From the first month I'd got the printer, I've already flash my ender with Jyer's firmware. 
Now, my ender running Marlin 2.1 with Automatic Universal Bed Leveling feature.
I will post the tutorial.... (I'll edited this post daily for complete tutorial)

New feature of Marlin 2.1.1 that i need is Magnetically Mounted Probe,. Work well with Klackender probe by Kevin aka Sam.

Thursday, July 14, 2022

Monday, June 13, 2022

First 3D Printer

 On May,2022 I got my first 3D Printer its Creality Ender 3 v2, the spec its out there . It's not new, but it's perfectly in good condition until it's in my hand :p. The only problem that I'm facing is, in just 2 weeks I blown the control board :D (be careful when you try to tweak the stepper motor ampere!, read the manual first), no love lost... and the control board is an older version, and eventually sooner or later I have to replace it anyway and i ordered the new control board (Creality 4.2.7 control board). So, after a while learning and fascinating with the machine I got bored :D... so I decide to extending the build volume. After browsing around and counting the budget I decided to extend  the machine to 310x310 with belt driven system for the Z axis, cause the budget were tight and I can print some of the parts (you can google the parts : Ender 3 v2 Belt Driven and the part is on the Thingverse ).  Its on going right now... hope I'm not braking anything in the process :p 

Tuesday, March 15, 2022

Install GRBL on STM32F103 (3 AXIS CNC)


The easy way 
1. Download dan extract Yaroslav Vlasov  6-AXIS-USBCNC-GRBL
3. Find the hex file on Release folder 
2. Run STMCubeProgramer
3. Flash the STM32
Remember, the default parameter is 4 AXIS.
Note : 
1.the default 4-AXIS parameter is only work with USG Platform (Universal Gcode Sender) 
2. For flashing the hex file you can google it, there are many tutorial about it.

Monday, February 7, 2022

GRBL32 (STM32F103) Configuration PART-1


STM32F103


I'm using STM32F103 board, bought it from online shop. these are the Firmware (stm32grbl11_v2) it's 4 axis, got it form Jim's Embeddedtronic Flash it to STM32 using STM32 ST-LINK Utility using ST-LINK V2 Dongle (you can find abounded the tutorial about using it. 

Saturday, October 26, 2019

late 2019

I always wanted a CNC machine,but the price is too high for me even now there is a cheap one.
I wanted to create one, been learn about all the thing that i should know about building it. gathering the items needed start from today...